How to Paint Interior Walls the Right Way
- Gene Pellegrene
- May 22
- 6 min read
A fresh wall color can make a room feel cleaner, brighter, and more finished in a single day - or it can highlight every patch, roller mark, and uneven seam if the prep is rushed. That is why knowing how to paint interior walls matters just as much as choosing the color itself. The difference between an average result and a polished one usually comes down to surface prep, product selection, and patience between coats.
For homeowners who care about the look and long-term value of their spaces, painting is not just a quick cosmetic fix. Walls are a major visual surface in the home. They catch morning light, frame artwork, and sit behind every piece of furniture. When the finish is smooth and consistent, the whole room feels more refined.
How to paint interior walls starts before the paint opens
Most painting problems begin long before the first roller pass. If the walls are dusty, glossy, cracked, or patched poorly, even premium paint will struggle to look its best. Good results start with a careful look at the existing surface.
Begin by moving furniture away from the walls and protecting floors properly. Lightweight plastic on the floor tends to shift and can become slippery, so canvas drop cloths are usually the better choice. Remove switch plates, outlet covers, nails, and wall hooks rather than painting around them. It takes a few extra minutes, but the finish looks cleaner because it actually is cleaner.
Next, wash the walls where needed. In kitchens, hallways, kids' rooms, and around light switches, walls often hold more grease and handprints than people realize. A mild cleaner and clean sponge will usually do the job. Let the surface dry fully before you patch or prime anything.
Then inspect the walls in angled light. This is where dents, nail pops, tape seams, and old repairs show up. Fill small holes and shallow dings with a quality spackle or patching compound. For larger imperfections, it may take more than one application. Sand the repairs smooth, feather the edges, and wipe away all dust. If you can feel the patch with your hand, there is a good chance you will still see it after paint.
The tools and materials that make a visible difference
There is a reason professional painters are selective about tools. Cheap rollers shed lint. Low-grade brushes leave streaks. Thin painter's tape can bleed. If the goal is a finish that feels crisp and durable, quality materials are worth it.
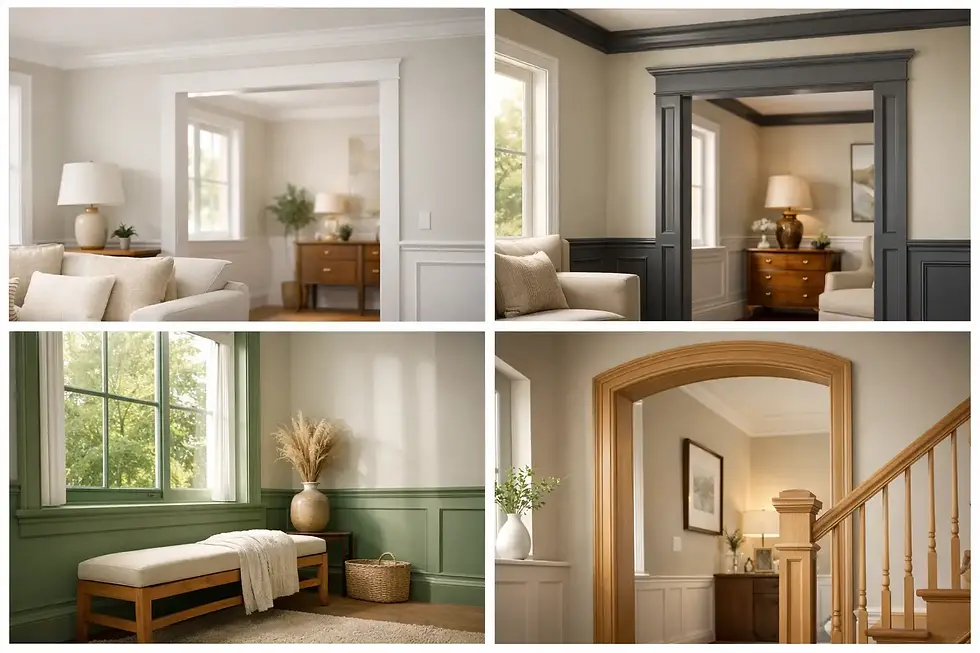
A dependable setup usually includes a high-quality angled brush for cutting in, a roller frame with the right nap for the wall texture, sturdy roller covers, a paint tray or bucket grid, painter's tape where appropriate, patching materials, sandpaper, primer, and the finish paint itself. Eggshell and matte finishes are common for interior walls, but the right sheen depends on the room. Flat paint hides imperfections well, though it can be less washable. Higher sheens are easier to clean, but they also reveal more flaws.
That trade-off matters. In an older Chicago home with imperfect plaster, a lower sheen may be the better visual choice. In a busy mudroom or children's playroom, durability may outweigh the need to disguise every surface irregularity.
Primer is not always required, but sometimes it is essential
One of the biggest misconceptions about how to paint interior walls is that paint-and-primer products replace all priming. Sometimes they do enough. Sometimes they do not.
If you are painting over a similar color and the existing wall is sound, clean, and not glossy, you may be able to go straight to the finish coats. But if the wall has fresh patches, stains, smoke damage, marker bleed-through, water marks, or a dramatic color change, primer is the right move. It helps with adhesion, evens porosity, and creates a more consistent final appearance.
This is especially important when covering repaired spots. Without primer, those patches can flash through the finish and look dull or textured compared to the surrounding wall. The color may match, but the sheen will not.
How to paint interior walls with clean lines and even coverage
Once the walls are clean, repaired, and primed as needed, it is time to paint. Start by stirring the paint thoroughly. If more than one can is being used in the same room, combine them in a larger bucket first. This helps avoid slight color differences from can to can.
Cut in first with a brush around ceilings, corners, trim, and outlets. The goal is not to create a thick painted border around the room. Instead, brush a smooth band that is wide enough for the roller to overlap while the paint is still workable. That overlap helps blend the brushwork and roller texture together.
Then roll the wall in manageable sections. A common mistake is trying to stretch the paint too far. Another is overworking it once it begins to set. Load the roller evenly, apply paint in a consistent pattern, and keep a wet edge as you move across the wall. If one section begins to dry before the next section meets it, you can end up with lap marks.
Two coats are usually the standard for a rich, even finish, even when the first coat looks decent. The second coat builds consistency in color, sheen, and durability. It is also what gives the wall that finished look homeowners tend to notice right away, even if they cannot explain why it looks better.
Common mistakes that make walls look less polished
A lot of disappointing paint jobs come from the same handful of issues. Painting over dust is one. Skipping patch sanding is another. Using too little paint, waiting too long between cut-in and rolling, or choosing the wrong nap can all leave visible texture problems.
Lighting also affects the result more than most people expect. Walls that look fine in soft evening light can show roller lines and patched areas the next morning. That is why experienced painters check surfaces at different times of day and from different angles.
Color choice matters too. Deep, saturated colors and very bright whites can both be less forgiving than mid-tone neutrals. Dark colors often require more careful application and sometimes an extra coat. Crisp whites can reveal every flaw in the substrate. Neither is off-limits, but both demand stronger prep and technique.
When DIY works and when calling a pro makes sense
Some homeowners enjoy painting and are very capable of doing a bedroom or office themselves. If the walls are in good condition, the room is mostly empty, and the finish expectations are realistic, a DIY project can absolutely work.
But some jobs are more demanding than they first appear. Tall foyers, detailed trim transitions, repaired plaster, strong color changes, wallpaper removal, and walls with years of wear all raise the level of difficulty. So does the expectation of a truly high-end finish. At that point, painting becomes less about putting color on the wall and more about surface restoration, product knowledge, and execution.
That is where craftsmanship shows. A premium result is not just neat edges. It is consistent sheen, invisible patching, thoughtful prep, and a finished space that feels calm and complete when the furniture goes back in place. That kind of work is what Artist Painters is known for, especially for homeowners who want the room to look elevated, not merely repainted.
A few final details that protect the finish
Do not rush recoat times just because the surface feels dry to the touch. Paint cures in stages, and adding the next coat too early can affect the final look. The same goes for putting furniture back too soon or scrubbing the walls right after painting.
Once the job is done, remove tape carefully, reinstall cover plates, and check the walls in daylight. Small touch-ups are normal, but they should be done with restraint. Overbrushing one tiny area can create more texture than the original flaw.
If you are planning to repaint several rooms, keep notes on the exact paint brand, color, sheen, and where each was used. That small habit makes future touch-ups and design updates much easier.
A beautifully painted room does not happen by accident. It comes from slowing down where it counts, treating the walls with care, and respecting all the details people notice without always realizing it. When the finish is done right, the room simply feels better to live in.